
Can you build a garden tractor for pulling? Yes, you absolutely can build a garden tractor for pulling! It’s a rewarding DIY project that transforms a yard workhorse into a competition-ready machine. This guide will walk you through the essential steps and considerations for your DIY tractor conversion.
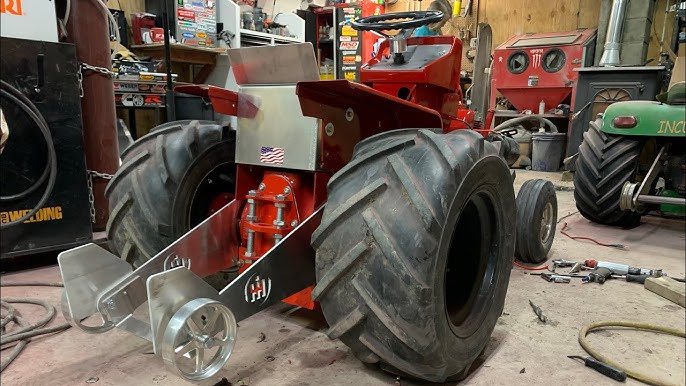
Image Source: i.ytimg.com
The Allure of the Garden Tractor Pull
Tractor pulling is a motorsport where drivers race modified tractors, pulling a heavy sled down a straight track. The goal is to pull the sled the furthest distance. While professional tractor pulling involves specialized, purpose-built machines, the spirit of the sport can be found in the grassroots world of garden tractor pulling. These events often feature modified lawn and garden tractors, making it an accessible and exciting arena for DIY enthusiasts.
The appeal lies in taking a relatively simple machine and pushing its limits through mechanical ingenuity and custom tractor fabrication. It’s about maximizing power, improving traction, and ensuring durability. This project combines mechanical skills, problem-solving, and a passion for horsepower.
Starting Point: Choosing Your Garden Tractor
The foundation of your pulling tractor is the garden tractor itself. Not all garden tractors are created equal, and some are better suited for modification than others.
Key Features to Look For:
- Robust Frame: A strong, well-built frame is crucial. Older, heavier-duty models often have superior construction compared to newer, lighter plastic-heavy units. Look for cast iron or heavy steel frames.
- Drivetrain Durability: The transmission and rear axle are critical. A heavier-duty transaxle designed for mowing might not withstand the stress of pulling. Hydrostatic transmissions can be a weak point; gear-driven transmissions are generally preferred.
- Engine Potential: While you might upgrade the engine, starting with a tractor that has a decent displacement and a robust mounting system is beneficial.
- Availability of Parts: Consider how easy it is to find replacement parts or aftermarket upgrades for the specific model you choose.
Commonly Used Garden Tractor Models for Pulling:
- John Deere: Older models like the 318, 332, or 420 are popular choices due to their robust construction and readily available parts.
- Cub Cadet: Many older Cub Cadets, particularly those with cast iron frames and solid rear axles, are excellent starting points.
- Simplicity/Allis-Chalmers: These brands often featured heavy-duty construction.
Phase 1: Engine Upgrades – More Power!
The heart of any pulling tractor is its engine. Stock garden tractor engines are usually air-cooled V-twins or single-cylinder units designed for mowing, not for sustained high-torque loads. This is where significant pull tractor performance gains are made.
Engine Swap Considerations:
- Power Output: The goal is to increase horsepower and torque significantly.
- Cooling: Air-cooled engines can overheat under the stress of pulling. Liquid-cooled engines are often a better choice for sustained effort.
- Mounting: The new engine must be securely mounted to the tractor’s frame.
- Drive System Compatibility: The engine’s crankshaft or PTO (Power Take-Off) shaft needs to connect to the tractor’s drivetrain.
Popular Engine Swap Options:
- Horizontal Shaft Briggs & Stratton Vanguard: These V-twin engines are very popular. They offer a good balance of power, reliability, and availability. You can find them in various horsepower ratings (16hp, 18hp, 23hp, and even larger).
- Kohler Command Series: Similar to the Vanguard, Kohler Command engines are also well-regarded for their durability and power.
- Honda GX Series: While often smaller, some larger GX series engines can be adapted, especially for lighter classes.
- Harley-Davidson Ironhead or Evolution Engines: For more advanced builds, these iconic V-twins offer substantial power but require more significant fabrication.
Performing the Engine Swap:
- Engine Selection: Choose an engine that fits your budget, skill level, and desired performance class.
- Mounting Plate Fabrication: You’ll likely need to fabricate a custom engine mounting plate to align the new engine with the tractor’s drive shaft. This involves precise measurements and welding.
- Drive Clutch/Coupling: Connect the engine’s crankshaft to the tractor’s input shaft. This might involve a custom-machined coupler or adapting a belt or chain drive system.
- Fuel System: Install a suitable fuel tank, fuel lines, and potentially an electric fuel pump if the new engine requires it.
- Exhaust System: Design and fabricate an exhaust system. Often, a straight pipe or a high-flow muffler is used. Ensure exhaust gases are directed safely away from the operator.
- Cooling System (if liquid-cooled): Mount a radiator and fan, and plumb the coolant lines.
- Electrical System: Wire the new engine’s ignition, starter, and charging system. You may need a new battery and alternator.
- Throttle Control: Adapt the tractor’s throttle linkage to the new engine.
Phase 2: Chassis Strengthening – Built to Withstand the Strain
Garden tractor frames are not designed for the immense forces encountered during pulling. Chassis strengthening is paramount to prevent catastrophic failure.
Key Areas for Reinforcement:
- Front Axle and Spindles: The front end takes a lot of abuse, especially when turning under load or hitting bumps.
- Reinforce Spindle Mounts: Weld reinforcing plates to the areas where the spindles attach to the frame.
- Heavy-Duty Tie Rods: Upgrade to stronger tie rods or fabricate custom ones.
- Steering Components: Consider heavier-duty steering gears or even a steering stabilizer.
- Rear Axle and Mounting Points: The rear axle bears the brunt of the pulling force.
- Axle Housing Reinforcement: Weld gussets and braces to the rear axle housing to prevent it from bending or cracking.
- Reinforce Axle Mounting: Strengthen the frame sections where the rear axle attaches. This often involves adding steel plates and bracing.
- Frame Rails: The main frame rails might need additional support, especially if the engine swap or other modifications add significant weight or leverage.
- Add Steel Plates: Weld steel plates to the inside or outside of the frame rails.
- Box Sectioning: For extreme builds, you might box in existing frame rails with additional steel to create a more rigid structure.
- Towing Hitch: The hitch is where the sled connects. It must be incredibly strong.
- Fabricate a Robust Hitch: Use thick steel plate and strong mounting points that are integrated into the strengthened frame. Ensure it’s positioned correctly to achieve proper weight transfer.
Techniques for Strengthening:
- Welding: High-quality welds are essential. MIG welding is common for DIY builds. Ensure proper cleaning and penetration.
- Gussets and Bracing: Use triangular or angled pieces of steel (gussets) to reinforce joints and corners. Add braces between frame members.
- Steel Plate Reinforcement: Weld flat steel plates onto existing frame members to increase their strength and rigidity.
Phase 3: Drivetrain and Transmission – Handling the Torque
The original garden tractor transmission is often a weak link. Enhancing its durability or replacing it is a critical step in your tractor pulling build.
Transmission Options and Upgrades:
- Strengthening the Stock Transmission:
- Gear Inspection and Replacement: Inspect all gears for wear or damage. Replace any worn components.
- Bearing Upgrades: Consider higher-quality bearings.
- Sealing: Ensure all seals are in good condition to prevent leaks.
- Transmission Swaps: For higher power levels, swapping to a more robust transmission might be necessary.
- Older Industrial Transmissions: Some older utility tractors or industrial equipment used stronger gearboxes that can be adapted.
- Custom Gearboxes: For the ultimate build, a custom-fabricated gearbox might be the only option.
- Differential Locking: A locked differential (or limited-slip) ensures both rear wheels receive power, significantly improving traction.
- Welding the Differential: The simplest (and often most robust) method for garden tractor pulling is to weld the spider gears inside the differential. This permanently locks both wheels together.
- Limited-Slip Differentials: Some tractors might have aftermarket limited-slip options available, but welding is more common and effective for pulling.
Drive Shaft and Coupling:
- Inspect and Reinforce: The drive shaft connecting the transmission to the rear axle should be inspected for straightness and damage. Consider using a thicker-walled shaft or adding reinforcing sleeves.
- U-Joints: Ensure U-joints are in good condition and properly greased.
Phase 4: Weight Transfer System – The Secret to Traction
Weight transfer is arguably the most critical factor in tractor pulling. It’s the process of shifting weight from the front of the tractor to the rear wheels as you pull. This maximizes the load the rear tires can handle, improving traction.
How Weight Transfer Works:
When you apply power to the rear wheels, the torque attempts to rotate the rear axle backward. This rotation pulls the rear of the tractor down and the front up. The weight of the tractor then shifts forward onto the rear axle. A good pulling tractor is designed to maximize this effect.
Key Components and Strategies:
- Ballast (Added Weight): The most common method is adding significant weight to the rear of the tractor.
- Wheel Weights: Heavy cast iron weights bolted to the rear wheels.
- Rear Hitch Ballast: Weight boxes, steel plates, or even concrete blocks secured to the hitch or rear frame.
- Water-Filled Tires: Filling the rear tires with a liquid (water, antifreeze mixture, or even a calcium chloride solution for more weight) is a very effective way to add unsprung weight.
- Wheelie Bars: Essential safety equipment and also part of the weight transfer system.
- Function: They prevent the tractor from flipping backward by limiting how high the front end can lift.
- Design: Typically constructed from sturdy steel tubing, with adjustable rollers or wheels. They should be mounted securely to the frame. The height of the wheelie bars influences how much the front end can lift, thereby controlling weight transfer.
- Tire Choice and Inflation: The right tires and how you use them are vital.
- Tread Pattern: Aggressive, deep lugs are best for digging into the dirt.
- Tire Size: Larger diameter tires can provide a mechanical advantage and allow for more weight in the tire.
- Tire Pressure: Lower tire pressures generally offer better ground contact and traction, but too low can lead to sidewall damage. Experimentation is key.
- Chassis Geometry: The length of your wheelbase and the height of your hitch can influence how effectively weight transfers. A longer wheelbase can sometimes be more stable.
Implementing a Weight Transfer System:
- Start with a Baseline: Ensure your chassis is strengthened and your rear axle is sound.
- Add Ballast Gradually: Begin with moderate ballast and increase it as you test. Too much weight can bog down the tractor.
- Adjust Wheelie Bar Height: Experiment with wheelie bar settings to find the sweet spot for lift and control.
- Consider Tire Compound and Tread: If possible, use tires specifically designed for pulling or soft ground conditions.
Phase 5: Tire Upgrades for Pulling – Gripping the Track
Tire upgrades for pulling are crucial for translating engine power into forward motion. Standard lawn mower tires will simply spin.
Tire Requirements:
- Traction: Deep, aggressive lugs are essential to dig into the dirt and provide grip.
- Durability: Tires need to withstand significant side-loading and potential impacts.
- Load Capacity: They must support the added weight of ballast.
Popular Tire Choices:
- Agri-Tires (Agricultural Tires): These are the go-to for most garden tractor pullers.
- Front Tires: Smaller, narrower tires with shallow tread for steering.
- Rear Tires: Wider, taller tires with aggressive, widely spaced lugs. Common sizes might range from 23×8.50-12 up to 26×12.00-12 or larger, depending on class rules and clearance.
- Specialty Pulling Tires: Some manufacturers produce tires specifically for tractor pulling, offering optimized tread patterns and compounds.
Tire Preparation and Care:
- Rim Preparation: Ensure the rims are strong and free of rust or damage. You may need to reinforce the rims or use aftermarket heavy-duty rims.
- Valve Stems: Use heavy-duty, metal valve stems.
- Tire Mounting: Proper mounting is critical, especially when filling with liquid. Ensure a good seal.
- Balancing: While less critical than on a car, balancing can help reduce vibration.
Phase 6: Braking System – Stopping Power
As your tractor gains power and weight, its braking system becomes increasingly important for safety and control.
Braking System Considerations:
- Stock Brakes: The original garden tractor brakes are usually too weak.
- Hydraulic Brakes: These are significantly more effective than mechanical brakes.
- Disc Brakes: Installing a disc brake system on the rear axle is a common and highly effective upgrade. This involves fabricating caliper mounting brackets and plumbing a master cylinder.
- Drum Brakes: Upgrading to a larger or more robust drum brake system from another vehicle might be an option, but disc brakes are generally preferred.
- Parking Brake: Ensure a reliable parking brake is functional, especially when working on inclines or during transport.
Phase 7: Safety First – Protecting the Driver
Safety should be the highest priority throughout the entire tractor pulling build process.
Essential Safety Features:
- Roll Bar/Roll Cage: Highly recommended, especially for tractors with significant engine power or those that lift their front wheels. It protects the driver in case of a rollover.
- Seat Belt: A secure seat belt keeps the driver in place.
- Kill Switch: An easily accessible kill switch to immediately shut off the engine in an emergency.
- Wheelie Bars: As mentioned earlier, crucial for preventing rollovers.
- Guards and Shields: Protect against moving parts like belts, chains, and rotating shafts.
- Fire Extinguisher: Keep a fire extinguisher within easy reach.
- Clear Visibility: Ensure no modifications obstruct the driver’s view.
- Braking System: As discussed, a reliable braking system is a fundamental safety feature.
Phase 8: Testing and Tuning – Dialing In Performance
Once your tractor is assembled, the real work of fine-tuning begins.
Testing Procedure:
- Initial Start-Up: Check for leaks, listen for unusual noises, and ensure all systems function correctly at idle.
- Low-Speed Testing: Gradually test the tractor’s movement, steering, and braking at low speeds in a safe, open area.
- Pulling Practice: Find a suitable area (like a field with soft dirt) to practice pulling a light load or a sled with minimal weight.
- Gradual Weight Increase: Slowly add weight to the sled and ballast to your tractor, observing how the machine handles.
- Monitor Temperatures: Keep an eye on engine and transmission temperatures.
- Listen to the Machine: Pay attention to any new noises or vibrations. These are often indicators of potential problems.
Tuning Adjustments:
- Engine Tuning: Adjust carburetor settings, ignition timing, and governor settings (if applicable) for optimal power delivery.
- Ballast Adjustment: Add or remove weight from the tractor based on how the front end lifts and traction levels.
- Tire Pressure: Experiment with different tire pressures to find the best grip.
- Wheelie Bar Height: Adjust wheelie bar height to control front-end lift.
- Hitch Height: The height of your hitch can affect how weight transfers; minor adjustments might be beneficial.
Rules and Classes: Know Before You Build
Tractor pulling is organized into various classes based on engine size, tractor type, weight, and modifications. It is crucial to research the rules of the specific pulling organizations or events you plan to participate in.
- Stock Classes: These have very strict rules, often allowing only minor modifications.
- Modified Classes: Offer much more freedom for engine swaps, chassis modifications, and custom fabrication.
- Garden Tractor Classes: Specifically for lawn and garden tractors, often with limits on tire size and engine displacement.
Adhering to the rules is essential for fair competition and to avoid disqualification. Building within a specific class framework will guide your choices for engine swaps, chassis modifications, and tire selection.
Common Challenges and Solutions
- Overheating: Ensure adequate cooling for the engine and transmission. Consider larger radiators, fans, or improved airflow.
- Drivetrain Failure: This is common if the original drivetrain isn’t reinforced or upgraded. Prioritize strengthening the rear axle and transmission.
- Lack of Traction: Insufficient ballast, wrong tires, or incorrect tire pressure are common culprits. Focus on weight transfer and tire choice.
- Steering Issues: Weak steering components can make control difficult. Upgrade tie rods, spindles, and steering gears.
- Frame Flex/Breakage: Reinforce the frame thoroughly, especially at stress points.
The Rewards of a DIY Pulling Tractor
Building a garden tractor for pulling is a journey that demands skill, patience, and dedication. The rewards are immense:
- Sense of Accomplishment: The satisfaction of building a powerful machine from the ground up.
- Competition: The thrill of competing and testing your creation against others.
- Mechanical Mastery: A deeper understanding and hands-on experience with engines, drivetrains, and fabrication.
- Community: Becoming part of a vibrant and passionate community of tractor pulling enthusiasts.
Your garden tractor modifications can transform a simple lawnmower into a formidable pulling machine. This comprehensive guide provides the roadmap for your tractor pulling build, enabling you to embark on this exciting DIY adventure.
Frequently Asked Questions (FAQ)
Q1: What is the most important aspect of building a pulling tractor?
A1: While many factors are crucial, weight transfer is often considered the most important for maximizing traction and achieving a successful pull.
Q2: Can I use a hydrostatic transmission in a pulling tractor?
A2: While some hydrostatic transmissions can be beefed up or used in lighter classes, they are generally a weak point. For higher power applications, a gear-driven transmission is usually preferred.
Q3: How much weight should I add to my tractor?
A3: The optimal amount of ballast varies greatly depending on the tractor’s weight, engine power, tire size, track conditions, and the class rules. You will need to experiment gradually to find the right balance.
Q4: What are the legal implications of modifying a garden tractor?
A4: Most tractor pulling events have specific rules regarding modifications. It’s essential to understand and adhere to these rules for the class you intend to compete in. Modifications for off-track use may have different regulations.
Q5: Is it expensive to build a pulling tractor?
A5: The cost can vary widely. You can build a competitive entry-level pulling tractor on a budget by using salvaged parts and performing your own fabrication. However, high-performance builds with specialized parts can become quite expensive.